Nutrition

PUMPKIN SPICE GRANOLA

bowl-breakfast-cereal-bowl-949069.jpg

As summer ends and fall lands upon us, some of us are feeling the sting as we let go of the sun and sand and slow-setting sunlight. While summer certainly has its share of cool treats, October brings to light a few things that help me adjust to the shift in season: the bright colors of the leaves, cozy, hygge-friendly mornings with a soft throw and cup of cocoa, comfy sweaters and scarves. Most notably, Fall begins the flavor craze for…wait for it…pumpkin spice!

Ah, pumpkin spice. Your return is welcomed by so many! What better way to warm your soul and start your morning than the warm notes of cinnamon, clove, ginger, nutmeg, and allspice—the pillars behind what makes this treat a classic (yet healthy) comfort food. Not to mention a delicious incentive for inching yourself out of bed in the morning.  

Not only is pumpkin beautiful in its shape, color, and taste, it also packs valuable nutritional benefits that help protect our bodies during the cooler temperatures. According to Ayurveda, ripe pumpkins can reduce Pitta energy while also helping to balance Vata. Although pumpkin is somewhat cooling, this quality is reduced when it is cooked, especially with ghee (avoid unripe pumpkins, as they are hard to digest and can aggravate all three doshas). Traditionally, pumpkins are believed to sharpen the intellect and induce calm, and so they are used for various mental imbalances and to reduce stress and agitation.

Due to its rich anti-oxidants like vitamin A, vitamin C, and vitamin E, pumpkin helps to balance out the metal element of the Fall season and prevent illnesses (Weaknesses in the lungs and large intestine often arise this time of year as allergies, asthma and constipation)

Pumpkins are sweet and grounding, corresponding to the earth element; therefore, relieving dampness and supporting digestive, respiratory, and overall health. It also contains fiber (balances blood glucose levels) and the minerals magnesium and potassium, which help to balance blood pressure and relax muscles, protecting the circulatory system.

Pumpkin also contain anti-inflammatory omega-3 fatty acids in the form of alpha-linolenic acid. Pumpkins are detoxifying, working to clean the bladder and surrounding organs.

So before another season sneaks up on us, let’s make the most of the calm before the cold. Now round up your best sweater and leggings and go get your pumpkin on 😊.

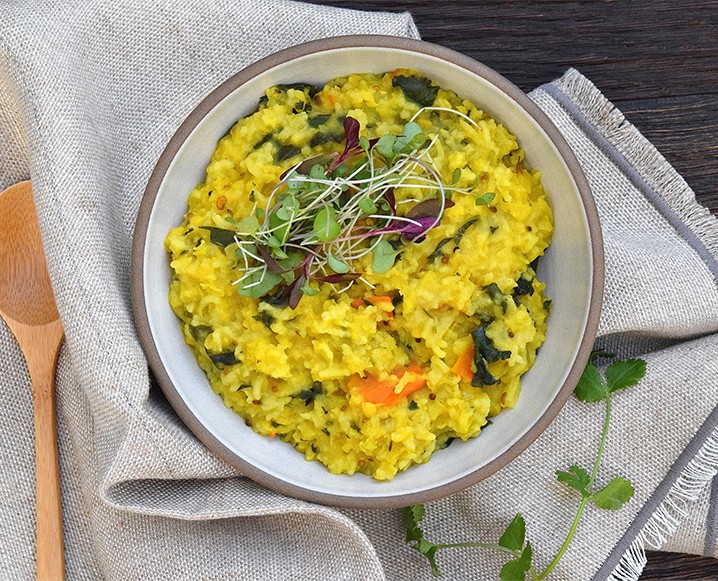
Without further ado, introducing the star of the show today: pumpkin spice granola.


Pumpkin Spice Granola

Ingredients:

3 cup oats
¾ cup your favorite dried fruits (ex. bananas, cherries, raisins, apricot)
1 cup pumpkin seeds
1 cup your favorite nuts and/or seeds (ex. almonds, pine nuts, cashews, walnuts, flaxseeds)
¼ cup honey
¼ cup coconut oil
1 tbsp pumpkin spice
1.5 tsp vanilla extract
Pinch of salt

Directions:

  1. Combine dry ingredients

  2. Combine wet ingredients

  3. Combine both dry + wet ingredients

  4. Bake at 350 for 15-20 mins

  5. Let cook before eating. Store in fridge for 7 days and sprinkle on yogurt, oats, or just eat it straight up!

Having trouble finding your way around the kitchen? Not sure what ingredients to use in order to make yourself the most nutritious food? Schedule a free conversation with me at www.natashawellness.com/appointment and let's chat about your health goals.

Resources: http://everydayayurveda.org 

CHA-CHA-CHA CHIA PUDDING

Who said pudding can’t be healthy? Especially when you add a power ingredient like chia—beyond healthy! From an Ayurvedic perspective, chia has several doshic benefits. It reduces vata—the air and space element, optimizes pitta—the fire element, and nourishes kapha—the water and earth elements.

Chia seeds are also sattvic, or pure in nature, meaning that they foster clarity and tranquility of the mind, while also nurturing the body.  According to Ayurveda, the chia seed creates a natural warming effect within the body-mind aura, enhancing cognitive health, a balanced metabolism and even joy. What a superfood hero! This is just one example showing how our diet can affect the body and mind, one of the basic principles of Ayurveda.

Chia seeds support deep hydration and have high quality fiber, helping to improve and conserve our ojas (inner strength and vitality). Adding even more super power with their large amounts of Omega-3 oils, chia seeds help conquer inflammation and control blood sugar.

Don’t yet believe the benefits? The proof is in the pudding!


Protein Packed (Chia) Pudding

Makes 4 servings

Ingredients:

1.5 cup carrageenan-free almond milk or homemade nut milk
1.5 cup pure coconut water (or just use double the milk if you have no coconut water)
1/2 cup chia seeds
1/2 cup oats
1 tbsp flax seeds (I like to grind my own in a coffee grinder)
1-2 tsp good cinnamon
4 scoops collagen peptides (the BEST protein boost, but optional if you are a veg. you can also use the marine collagen)


Directions:
1. Combine all ingredients in quart sized mason jar, collagen last (or else it will congeal all your chia seeds).
2. Shake vigorously. then shake again after 5 minutes. Then shake again after another 5 minutes.
3. Stick it in the fridge overnight.
4. Divide into clear glasses or jars, top with berries, stewed apples, banana, coconut, and/or my favorite - paleo granola.
 

Resources:
Yoga Journal: https://www.yogajournal.com/lifestyle/doshas-decoded-learn-unique-mind-body-type#gid=ci02075699b0132620&pid=woman-doing-chandra-bhedana-moon-breath-pranayama-nadi-shodhana 
La Yoga: https://layoga.com/life-style/ayurveda/the-ayurvedic-benefits-of-chia-seeds/

ESSENTIAL SPROUTING GUIDE

boston health coach sprout

I became curious about sprouting while enrolled in my 10-week Ayurvedic-based habit change program. (I'll be announcing my pilot program for 50% off the normal rate soon - make sure you sign up for my newsletter so you don't miss it!) One of the habits is Plant Based Diet (PBD) which involves a deeper look at the plants we eat. I already do my best to eat local and organic. My go-to grocery stores are Whole Foods & Trader Joes. I'm lucky enough to live within walking distance of both, and each store carries their own unique options. Lately, I've been making more of an effort to get to know my local plant species. Now, I spend more time at the Boston Public Market, Boston Growers in Coolidge Corner, and various other farmers markets near my home in Cambridge. I also recently signed up for Boston Organics - a super customizable no commitment CSA-type of program. Check it out if you're in the area!

Ok let's chat SPROUTS. I used to purchase sprouts at Whole Foods until I found out how simple and affordable it is to grow them at home. I'm talking $5 vs. $.25... pretty big difference right? The best part is that it's so easy! Indoor gardening may sound intimidating ...it totally did to me. Let's just say, I'm not the BEST at keeping plants alive. But sprouting is a game-changer. My favorite part about this sprouting recipe is that it requires no soil - the key to why it's so simple. Honestly, the hardest part about sprouting is remembering to rinse your seeds twice a day. 

Sprouts are the quintessential nutritional powerhouse. Think of a plant as a human being. A seed as an embryo, a sprout as a feisty and energetic toddler, a full grown plant as a strong and grounded adult. When we eat unsprouted seeds we are eating locked up potential. If sprouts are comparable to an energetic toddler, can you imagine about how much more energy sprouted seeds can provide? Imagine absorbing all that energy. When you eat sprouts you are literally eating potential, energy, and fresh perspective. Don't get me wrong, seeds and nuts are still good for you, and fully grown plants have their place in our diet as well. It's just that sprouting seeds cracks open their potential making their nutrients more digestible and bio-available to your body. (To sprout nuts all you have to do is soak them overnight in a bowl of water and rinse them in the morning. They won't grow a tail but you'll notice they become more plump and soft. Eat them right away or dehydrate and freeze them for snacking. If you get bellyaches from eating nuts this is a game changer).

Eating sprouts will...

improve your digestion, boost metabolism, increase enzymatic activity throughout the body, help with weight loss, lower cholesterol, prevent anemia, boost skin health, improve vision, support the immune system, increase energy reserves, reduce blood pressure, and prevent neural tube defects in infants.

The most common sprouts are alfalfa. You'll typically find those in grocery stores but you can really sprout any seed! Just make sure you are buying "sprouting seeds". I get mine at Cambridge Naturals. Try out a few different seed varieties and see what you vibe most with!

Sprouts contain:
- Vitamin C, A, K, B6
- Fiber
- Manganese
- Riboflavin
- Copper
- Protein
- Thiamin and Niacin
- Panthothenic acid
- Iron
- Magnesium
- Phosphorus
- Potassium
- Calcium

How to make your own Sprouts

Kitchen Tools & Ingredients:
32 oz Mason Jar
Sprouting Lid, cheesecloth or a Mason Jar lid with holes poked in it
Sprouting Seeds like Alfalfa, Red Clover, Broccoli (purchase at local herb market or Amazon)

Directions
1. Soak 1 tablespoon of sprouting seeds in water for 10 minutes.
2. Strain seeds through the sprouting lid, cheesecloth or holey lid.
3. Put seeds into jar with a cup or two (doesn't have to be accurate) of cool water. Let sit for 8 hours.
4. Drain the jar, shake the jar to spread the seeds around the inside of the jar (you do not want the seeds covering the drain holes), and place lid-side down in a bowl on a slant so the water can continue to drain.
5. Rinse and swirl seeds in the jar 2-3 times a day, placing it back in the bowl at an angle. Do this for 4 days.
6. After 4 days, place the sprouts by the window in indirect sunlight to help them green up and develop chlorophyll. Do your rinsing routine keeping them by the window for 2 more days.
7. Once you see green tails and a little tiny leaf, you will know your sprouts are ready! Empty your cute little sprouts in a large bowl of cool water and use your fingers to loosen up the sprouts. Use a mini strainer or spoon to remove the seeds that floated to the top.
8. Spread 2 layers of paper towel on a baking sheet and lay your sprouts out to dry (you can use a salad spinner if you have one) for a few hours. Timing will vary on your indoor climate.
9. To store, first make sure your sprouts are dry (or they will rot). Line a tupperware container with a paper towel and pack in your sprouts. You can pack them in tightly, this will not affect their quality.

My favorite ways to enjoy raw sprouts (cooking sprouts negates their nutritional value):
- Avocado Toast
- Salads
- Warm Grain Bowls
- Sandwiches

What's your favorite way to eat sprouts? Leave me a comment below!


NATASHA'S SIMPLE KITCHARI

What is Kitchari? Kitchari is here to help you grow spiritually, physically, and emotionally. Kitchari has been consumed for over 10,000 years in India. It's fed to babies, seniors, the sickly; and eaten by those who have no appetite, have returned from a long trip or are simply on a budget.

Kitchari is also used as a cleansing method where you actually get to EAT. Now that's my kinda cleanse. To do this cleanse you eat kitchari for each meal, 3 or 4 times a day, until you are full. Remember, full doesn't mean stuffed. Full means 1/3 food, 1/3 water and 1/3 space. Yes, veggies partially count as water. No deprivation, no starvation, just pure grounded goodness. If you can't stomach kitchari in the morning feel free to eat a simple bowl of oatmeal (with no toppings!) instead and resume eating kitchari for your other meals. I'll do a kitchari cleanse mono-diet a couple times a year; spring and fall or whenever I feel like I need a reset which most of the time means after the holidays, too! I promise if you do this cleanse you will feel grounded, balanced and deeply nourished.

Did you know that it is statistically proven that juice cleanses actually HARM our bodies. Why is this fad still around! I don't get it. Intense food deprivation cleanses okay for you but are not sustainable unless you are following all of the proper rules (enema's, relaxation, reflection, etc.). I personally don't go there, so kitchari is the perfect cleanse food cleanse for me and it's a great place to start for anybody. The mix of rice and dahl in kitchari contain 20 essential amino acids which create a perfect protein to sustain your body. You can also eat this as a main or side dish, even if you're not cleansing... it's that tasty.

If you're curious to find out more about kitchari sign up for a free call and we can chat. I'd be happy to guide you through my experience with cleansing and Ayurveda by providing you with helpful steps, tips, and insight. 

Image credit : The Chalkboard Mag

Natasha's Simple Kitchari Recipe

Prep time: 6-12 hours (includes soaking time)
Cook time: 30 mins
Serves: 4-6 servings

INGREDIENTS
½ cup split mung beans (link at bottom of post)
¼ cup organic basmati rice (or quinoa if you have a kapha imbalance)
1 3x2 inch strip of kombu seaweed, cut into small pieces, or a few pieces of dried wakame
6-8 cups of filtered water
3-4 cups fresh, organic and seasonal veggies (use at least one green veggie such as spinach or kale and one orange or root vegetable such as carrot, sweet potato or squash)
1-2 Tbsp of CCF blend (made by grinding equal parts of cumin, coriander and fennel seed or by mixing the pre-ground spices)
⅛ tsp asafoetida/hing (not gluten-free, add extra ginger if you are gluten sensitive)
1 Tbsp minced fresh ginger root
1 tsp turmeric powder
1 cup loosely packed chopped, fresh organic cilantro
2-3 Tbsp ghee (Vegans can use coconut oil in the warmer months or sesame oil in the cooler months use less ghee if you have kapha imbalance, lots of accumulation, or excess weight).
½ - 1 tsp rock salt

INSTRUCTIONS

1. Soak the grain and split mung beans (I don’t really measure I just do a 2:1 ratio of beans to rice) overnight or between 6-12 hours.

2. Rinse the grain and mung beans until the water runs clear then put them in a big pot with the seaweed and water enough to cover by at least an inch or 2 (about 3 cups of water depending on your pot).

3. Boil until soft, about 15-20 minutes. Chop veggies and cilantro and grind spices (if using whole spices. You can also roast them before grinding to enhance the flavors) as the rice and beans cook.

4. Add the veggies (keep kale or quick-cooking veggies out for now), add 2 more cups of water and cover. Cook 3-5 minutes or so until the water boils veggies are starting to soften. Add more water and adjust temperature as needed.

5. Once veggies start to soften, add the minced ginger, and spices (cumin, coriander, fennel, asafoetida and turmeric).  When making a warming kitchari in the fall or winter I’ll add a little black pepper and a dash of cinnamon too, maybe some raisins.

6. Add the kale, spinach or other quick-cooking veggies and the fresh cilantro. Stir.

7. Add ghee or oil (or neither) and rock salt.

8. Turn off heat, and serve with microgreens/fresh cilantro and a wedge of lime or chutney.

Try this out and if you don't like these spices then go ahead and use your favorites. You can use italian spices, Mediterranean spices, whatever! Let your creativity flow. Share this recipe with a friend! It's always best to cleanse with an accountability partner.

If the list of ingredients stresses you out you can purchase a hand-dandy Kitchari kit here!


RAW GREEN SOUP

It's April 1st and it's snowing... it's time to admit climate change is real if you don't already. I'm bundled up in my toasty home, spending the day doing yoga, chillin with my puggle Eva and watching The Kitchen of course.

This week I've decided to incorporate more local veggies, more greens, more soups and more living things in my diet lately. Not living things like humans or animals but living vegetables, fresh, raw and ALIVE. Cate Stillman shared an amazing recipe with our group on Body Thrive (an amazing 10-week Ayurveda program I'm deep into). Spring is Kapha season but it just started snowing where I live so I'm still eating Vata-balancing foods. I made this soup just now and it is so freakin' quick and easy. The hardest part was getting out of the house to buy ingredients. I just finished eating it and I am stuffed, happy, hydrated, and warmed to the core. I'm also surprisingly full! I love myself a warm grain bowl with protein but as I head into Spring I'm looking to let go of some heaviness so this is exactly what I needed. So, if you're feeling chilly or are Vata-dominant this soup is for you. If you aren't sure what your Dosha is you can take this quiz. Take your results with a grain of salt and use them more as a guideline. To find out what your Dosha is exactly takes a lot more than an online quiz. My teacher once told me it requires 7-14 visits everyday to an Ayurvedic practitioner who reads your tongue, pulse, etc every time you come in. 

According to my quiz results, I am equally tridoshic which is a bit confusing and doesn't guide me as easily as someone who is predominantly Vata, Kapha, or Pitta. This is why I follow the seasons and listen to what my body wants. That's really what Ayuerveda is all about - listening to your body and eaing, moving, breathing in a way that is suitable for YOUR BODY. Try this recipe and let me know what you think. And if it's too raw for you, cook it up a little post-blend.

Basic Vata Green Living Soup

Serves 2
Prep & cook time: 10 minutes
Adapted from Cate Stillman's Basic Vata Green Soup Recipe

Ingredients
1 cup fennel
1/2 cup yellow peppers
1 avocado
1/4 cup fresh basil or dill chopped
1 tbsp lemon juice
1/2 tsp honey
1 veggie broth cube
a dash or two of cayenne
salt and pepper to taste

Directions:
Blend with 4 cups boiling water. Garnish with fennel greens, dill, or sprouts.

And this is what you get... doesn't that color just brighten your day?


You can find this and other living soup recipes here.

HOMEMADE SAUERKRAUT

The calm before the storm at our Twist & Kraut Workshop back in February

The calm before the storm at our Twist & Kraut Workshop back in February

How To Make Homemade Sauerkraut in a Mason Jar

Prep time: 5 min
Cook time: 15 min
Makes: 1/2 to ¾ of a quart

Adapted from The Kitchn

INGREDIENTS
1/2 medium head cabbage (about 1.5 pounds)
2 1/4 teaspoons kosher or himalayan salt

EQUIPMENT
Cutting board
Chef's knife
Mixing bowl
1-quart wide-mouth canning jar (or two pint mason jars)

INSTRUCTIONS

  1. Clean everything: When fermenting anything, it's best to give the good, beneficial bacteria every chance of succeeding by starting off with as clean an environment as possible. Make sure your mason jar is washed and rinsed of all soap residue. You'll be using your hands to massage the salt into the cabbage, so give those a good wash, too. Wipe everything (cutting board, knife, jar) with white vinegar.

  2. Slice the cabbage: Discard the wilted, limp outer leaves of the cabbage. Slice the cabbage crosswise into very thin ribbons. Save a large outer leaf for step #5.

  3. Combine the cabbage and salt: Transfer the cabbage to a big mixing bowl and sprinkle the salt over top. Begin working the salt into the cabbage by massaging and squeezing the cabbage with your hands. At first it might not seem like enough salt, but gradually the cabbage will become watery and limp — more like coleslaw than raw cabbage. This will take 5 to 10 minutes.

  4. Pack the cabbage into the jar: Grab handfuls of the cabbage and pack them into the canning jar. Every so often, tamp down the cabbage in the jar with your fist. Pour any liquid released by the cabbage while you were massaging it into the jar.

  5. Place one of the larger outer leaves of the cabbage over the surface of the sliced cabbage. This will help keep the cabbage submerged in its liquid.

  6. Lid the jar.

  7. Press the cabbage the next day. As the cabbage releases its liquid, it will become more limp and compact and the liquid will rise over the top of the cabbage.

  8. Add extra liquid, if needed: If after 24 hours, the liquid has not risen above the cabbage, dissolve 1 teaspoon of salt in 1 cup of water and add enough to submerge the cabbage.

  9. Ferment the cabbage for 3 to 14 days. Your taste will determine when it’s done more so than length of time. As it's fermenting, keep the sauerkraut away from direct sunlight and at a cool room temperature — ideally 65°F to 75°F. Burp (to release the pressure) it daily and press it down if the cabbage is floating above the liquid.

  10. Because this is a small batch of sauerkraut, it will ferment more quickly than larger batches. Start tasting it after 3 days — when the sauerkraut tastes good to you, put it in the refrigerator. You can also allow the sauerkraut to continue fermenting for 14 days or even longer. There's no hard-and-fast rule for when the sauerkraut is "done" — go by how it tastes.

  11. While it's fermenting, you may see bubbles coming through the cabbage, foam on the top, or white scum. These are all signs of a healthy, happy fermentation process. The scum can be skimmed off the top either during fermentation or before refrigerating. If you see any mold, toss it.

  12. Store sauerkraut for several months: This sauerkraut is a fermented product so it will keep for at least two months and often longer if kept refrigerated. As long as it still tastes and smells good to eat, it will be. If you like, you can transfer the sauerkraut to a smaller container for longer storage.

Recipe Notes

  • Sauerkraut with other cabbages: Red cabbage, napa cabbage, and other cabbages all make great sauerkraut. Make individual batches or mix them up for a multi-colored sauerkraut!

  • Larger or smaller batches: To make larger or smaller batches of sauerkraut, keep same ratio of cabbage to salt and adjust the size of the container. Smaller batches will ferment more quickly and larger batches will take longer.

  • Hot and cold temperatures: Do everything you can to store sauerkraut at a cool room temperature. At high temperatures, the sauerkraut can sometimes become unappetizingly mushy or go bad. Low temperatures (above freezing) are fine, but fermentation will proceed more slowly.

What's your favorite fermented food recipe? Please share below!